How To Cross Country Ski
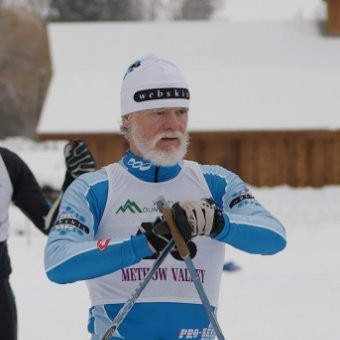
Author: Bert Hinkley, nordic ski expert at Webcyclery & Webskis
Last updated: November 2022
Introduction
For those out there who may be new to the sport of cross country skiing, WELCOME. Cross country skiing can help people of all ages to maintain physical and mental health.
I have been skiing since 1959 and still cross country ski 4 - 5 times a week. I live in a place that has snow and networks of trials in the woods where I ski, see friends, get exercise and find some peace in a goofy world.
I'm hoping that learning to ski will add as much to your life as it has to mine!
Table of contents
Get the right cross country ski gear
There are other pages on this site that talk about choosing equipment and waxing skis. If you're still looking for all the right gear, check out our other guides on how to choose the right skis, boots, poles, clothing, wax, and more:
- Cross Country Skiing Buyer's Guide
- How to choose cross country skis
- How to choose cross country ski boots
- How to choose cross country ski poles
- What to wear cross country skiing
- How to wax cross country skis
But let’s say you've checked out the guides above and have the skis, boots, bindings and poles and you are ready to start moving. Yahoo! You now have boots that fit, skis that are right for you, and poles that are the right length. It's time to get out on the snow.
We can first chat about how to put on the skis.
How to use cross country ski gear
How to put on cross country skis
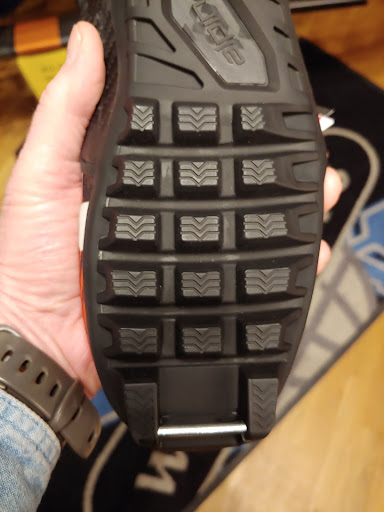
Notice that on the sole of your boots is a steel bar up front under your toes.
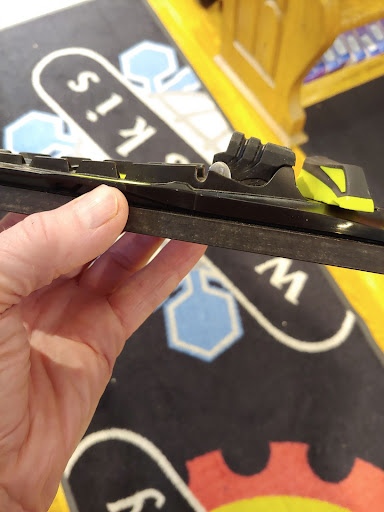
Then take a look at your binding. There are a number of different bindings available. If your setup is new, you will likely have a Rottefella NNN binding, or a Fischer/Rossingnol IFP binding, or a Salomon Prolink binding. What is great now is that all those bindings are compatible with NNN soles, Prolink soles or Fischer soles. To connect the boot with the binding you need to open the jaw of the binding. With the Rottefella and the Salomon binding this means lifting the lever in the front of the binding.
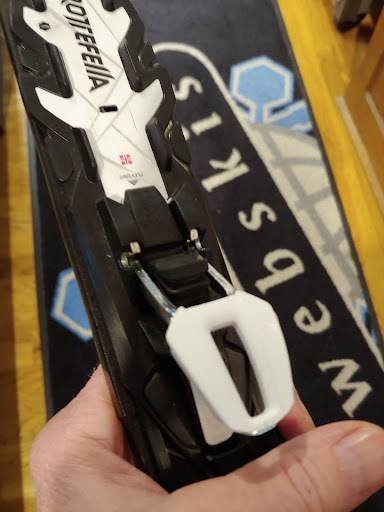
With the Fischer or Rossingnol binding the lever turns left or right and it opens the jaw into which you will put the bar on the boot sole.
Now, balancing with both ski poles in one hand and those poles vertical with tips in the snow (balance assist), place the bar on the sole of the boot into the jaw of the binding. While doing this be sure to raise your heel so the bar goes into the jaw. Now close the jaw lever and check to make sure the boot is connected. It is IMPORTANT to be sure that there is no snow stuck to the sole of your boot. This is why it is good to ski with a friend who can help remove snow from the bottom of the boot.

Your boot should now be attached to the ski.
How to take off cross country skis
To take off the skis, be careful to stop first. This process is the exact reverse of what you did to put on the skis. Take off both poles and hold them in one hand, tips of poles in the snow (balance assist). Carefully bend down and grasp the lever on the binding. Pull up (Rottefella or Salomon) or twist (Fischer or Rossignol) the lever. You should be able to lift the boot off the ski.
How to hold a cross country ski pole
Before you try to glide off through the forest, start by putting on your ski poles and simply walking around the nicely groomed, flat area. You should find that walking with ski poles is pretty easy and just like walking without poles, the right hand and pole swing forward as the left foot moves forward. This is called opposition. Left hand and pole forward, right foot forward. Walk in a straight path, walk in circles, turn around and notice how the poles can help with balance.

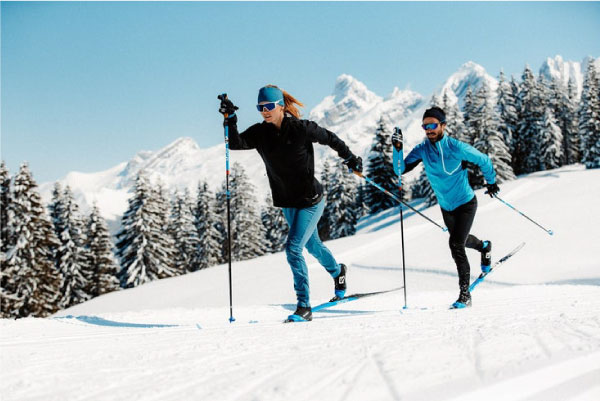
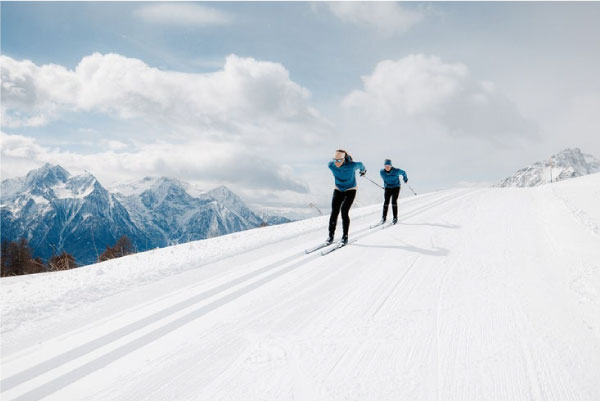
Cross country skiing technique
How to start cross country skiing
To begin classic skiing is like walking. With the right pole in the snow and the weight on the right foot, push the left foot forward shifting your weight to the left foot and feel the ski glide. Now place the left pole in the snow, push down with the left foot and move the right foot forward. Look up and forward and not down at your feet and with short balanced steps, kick and glide along the track. You are now cross country skiing!
As you begin to learn how to cross country ski, it is important to start on easy, flat terrain. When getting started it is also easier to learn at a place where the snow is packed smoothly, groomed. Dealing with deep snow adds challenges to this learning process, so stay on the groomed snow for the first few times out.
How to stop on cross country skis
One way to stop is to just glide along until you come to an uphill. The force of gravity will overcome the momentum you possess. All great if the terrain is gently rolling and you have the cooperation of gravity. But we know that this will not always be the case. There will be times when you have to apply the brakes (increase the friction between the ski and the snow).
One way to do this is to execute a move we used to call a snowplow and is generally referred to as a wedge or “pizza shape”. Here the skis are moved so that the tips are close together while you push the tails (your heels) apart and away from the centerline of movement. I know that if you have never been on snow before, this may sound nutty. But it is an essential skill to master for any type of skiing.
To learn this, find a piece of terrain where you can stand on the skis with a gentle downhill slope before you. Easily allow yourself to start to move down the hill in the athletic stance and as you move, bend ankles, knees and lower your hips (sort of squat) and push the tails of the skis apart. On a gentle hill and at a slow speed, this should increase the friction between the edges of your skis and the snow. You should stop. Then, gently rise up a little and allow the skis to come more parallel and then repeat the flexion of your joints and push the tails out again. This drill will allow you to come to a stop on easy terrain. Repeat these movements until you are at the bottom of the hill, turn around, ski back up the hill and try it all again.
Adding the groomed or skied in track to your forward momentum (those grooves in the snow that guide the skis in classic skiing) adds another degree of difficulty to the snowplow / wedge. Here I like to practice putting one foot out of the track and pushing the tail of that ski away from the centerline. This snowplow on one side is great for slowing before a sharp turn or stopping while carrying some speed in the track. You can see, again, that balancing on one foot and shifting weight comes into play.
I guess that there are places where you could ski along for a ways on flat terrain. I have never lived in such a place, so we are generally going uphill or downhill.
How to go uphill on cross country skis
Most cross country trials go up and down. The going down part is assisted by gravity and on gentle terrain is pretty easy. Going uphill requires more work.
A few definitions may be in order. If you are starting out on modern skis in the classical style (which is what I would recommend) there is a section on the base of the skis with a fish-scale pattern or a mohair section that we call the “kick zone”.
This section of the ski helps keep it from sliding backward when weighted. With this fish-scale or mohair pressed against the snow you should be able to push the other foot and ski forward. You will then shift your weight to that ski, push it down against the snow and push the other ski forward. This pushing down action is called “kick”. It sort of looks like you are pushing the foot backwards, but you should be pushing it down with a quick motion and then pushing the opposite ski forward.
On the flat terrain this can look like a graceful stride and glide rhythm. But, come to an uphill and you have to increase the effort. It is now time to increase the cadence. Shorter, quicker steps are needed to set the kick zone. A common mistake is to lean too far forward. This drives the hips backward and does not allow you to really press the ski against the snow. So, keep looking up and forward, shorten your stride, push down quickly and harder and kick, kick, kick up the hill.
There may be places where the angle of the hill is just too steep to stride up in or out of the track. Here you may need to do what we call a “herringbone” . The herringbone is done in a position that is the opposite of the snowplow. Here, while you are facing uphill, the tails of the skis are close together and the tips are apart. And now, with the edges of the skis pressed into the snow, you walk (duck walk) up the hill moving the poles in opposition. It is important to have the skis edged and you push off the inside edge of the ski as you move the other foot up the hill.
How to go downhill on cross country skis
Skiing downhill is often just a matter of letting gravity assist you and assuming that athletic stance with equal weight on each foot. If it is not too steep, then this acceleration is exhilarating. Many people I know will struggle uphill as long as there is a good payback of a long downhill after.
Yes, you will become a physics experiment as you gain momentum and the outside force and friction of the ground can impart pain and injury if you fall. This should reinforce your awareness of skiing on appropriate terrain for your skill. I can assure you that no one is bullet-proof.
How to turn on cross country skis
It's important to be able to change direction when skiing. Turning not only helps you follow the track, but it can also keep you in control by slowing your momentum. There are several different ways to turn, and you may want to use one over the other depending on the terrain.
While sliding on flat or low angle slopes, you can perform a "step turn", where you pick your skis up off the snow enough to shift their position in the direction you want to turn.
You can also use the snowplow technique discussed in the how to stop section above. While in the snowplow position, you can shift your weight to one leg and set your hips in the direction you want to go. The leg you put the weight on will become your downhill ski as you start to traverse across the slope rather than straight down it. You can shift your body weight to the other leg to turn the other way.
There are other turn techniques like the telemark turn, but if you're just starting out it's best to master the two above first.
How to get up after falling on cross country skis
When you fall - and I am pretty sure that you will - you will have to get up.
There are a number of methods to use to get back on your feet. In any of these the first thing to do is take off your poles and place them together beside you. One way to stand is to try to roll onto your back with your feet and skis above you. Think of a turtle on its back with feet in the air. Then you should be aware of which side is uphill and which is downhill. From this position, roll both feet and your skis to the downhill side and place them across the hill.
If you are on a packed trail, take off your skis and stand up by moving to your knees and then placing one foot in front, rolling your weight on that foot and standing. Use your poles to help if you need to. You will then have to clean the snow out of the soles of the boots and put the skis back on. Brush the snow off your pants and arms, put the pole straps on and proceed.
Some skiers find that they don’t have to remove their skis. They will start to get up by taking off the poles, rolling to a position where both skis are parallel to each other and on the downhill side. Bend the knees so that your feet are close to your hips and push up onto one knee. Keeping the feet right under you, from this position you can stand up. The skis are still on and you brush off the snow, put the wrist straps on and push onward.
Cross country ski safety
In any outdoor athletic/recreational pursuit there is risk. Cross country skiing is no exception. Certainly, there is less inherent risk in cross country skiing than in alpine skiing. Speeds are generally slower. The foot is not fixed to the ski at both toe and heel. Keep in mind, however, that the skis can exert extreme leverage on your legs in a fall.
The setting is outdoors in the winter, so weather can play a role in the amount of risk involved. I would say that step number one in safe skiing is to “turn on your brain”. This is not automatic for everyone. But the phrase “what if …” should be recognized before you begin to take up any new athletic activity. Winter temps and snow do not care how tough you perceive yourself to be.
Dress properly: Dressing in layers applies here, with the idea being moisture management. We wrote a whole separate guide on what to wear cross country skiing, so check that out if you want to learn how to dial in your kit.
Don't ski alone: As a new skier, it would be a good idea to go out with an instructor or a trusted partner. It is more social and safer. At least let someone know when and where you plan to ski.
Pick appropriate terrain: Look at the maps of the ski trails. In cross country skiing the symbols for the difficulty of the trails is the same as in alpine skiing; green circle means easy; blue square is more difficult; black diamond is most difficult. If you are not on a regular ski trail, be familiar with the topo-maps and the steepness of the hills. As a beginner, stay away from the black diamond trails. Gain skills a little at a time and move carefully on to the next challenge.
Bring food and water: Cross country skiing burns a lot of calories. It takes a whole pile of fuel to keep you moving and to keep you warm outside in the winter. I suggest carrying a snack of an energy bar, a glucose gel, or even a small candy bar with you in a pocket or small pack. I carry water in a pack that has space for my phone, my snack, and a binding tool.
Check gear regularly: Stuff can break. Become familiar with your poles, bindings and boots. Broken equipment is a pain and it can cause an accident. Know how your pole straps work and how to adjust them if needed. Be sure that your poles are not cracked, crushed or nicked. Know how the bindings work and replace worn parts or broken base plates.
Where can you go cross country skiing?
Most often, cross country skiing is done at designated nordic parks where there are set tracks and groomed trails. If you're starting out I'd recommend heading to your local nordic park, where you'll benefit from maintained trails, helpful maps, and the advantage of being around others.
If you live in Bend or are visiting, check out our page on where to go cross country skiing. We're also happy to give advice if you pop into the store.
Should you take cross country skiing lessons?
Cross country skiing is not as fast or steep or dangerous as alpine skiing, so once you have your gear you can definitely give it a try without formal lessons. There will be trail and error but that's all part of the learning process.
However, if you're the type of person who likes to receive instruction from experts, you'll likely progress more quickly with lessons.
There's no wrong way to get out there!